Hasselback Potatoes: A Cozy Treat for Any Night
There’s something undeniably comforting about a perfectly roasted potato. When I was a child, I remember the warm aroma of baked potatoes wafting through the kitchen as the sun set, signaling the end of a busy day. My mom would often make Hasselback potatoes for special family dinners, the crispy edges tantalizing our senses and the buttery goodness melting in our mouths. This easy weeknight dinner not only fills your home with warmth but also brings everyone together around the table for heartwarming conversations.
And just like that, Hasselback potatoes have become one of my go-to recipes for a simple yet delightful side dish. With golden, tender layers and a delightful crunch, they make any meal feel special. This is one you’ll definitely want to pin for later!
Why You’ll Love This Recipe
- Easy and Elegant: Hasselback potatoes elevate any meal with minimal effort, perfect for impressing guests or simply treating your family.
- Crispy and Creamy: The outer layers get satisfyingly crispy while the inside remains fluffy and creamy.
- Customizable: Endless variations to suit your taste with different toppings and flavors.
- Family-Friendly: Kids and adults alike go crazy for these delicious potatoes—making it an all-time family favorite!
- Perfect for Any Occasion: These make a fantastic side dish whether it’s a cozy weeknight dinner or a festive holiday gathering.
What You’ll Need
Ingredients You’ll Need for Hasselback Potatoes
- 4 medium russet potatoes
- 4 tablespoons melted butter
- Salt, to taste
- Pepper, to taste
How to Make Hasselback Potatoes
Let’s make it together! Follow these easy steps to whip up your own batch of delicious Hasselback potatoes.
- Preheat the oven to 425°F (220°C).
- Wash and dry the russet potatoes thoroughly, ensuring they’re clean and ready to shine on your dinner table.
- Thinly slice the potatoes, making nearly all the way through, creating those lovely ‘hasselback’ cuts that look so fancy but are surprisingly easy to create.
- Place the prepared potatoes on a baking sheet, leaving some space between them to allow for even cooking.
- Brush the melted butter generously over the potatoes, ensuring to get it in between the slices—this is where the magic happens!
- Season the potatoes with a sprinkle of salt and pepper, adjusting to your taste.
- Bake in the preheated oven for about 45-60 minutes, or until they are crispy and golden brown. Your kitchen will smell cozy and inviting, making it hard to resist!
Variations & Creative Twists
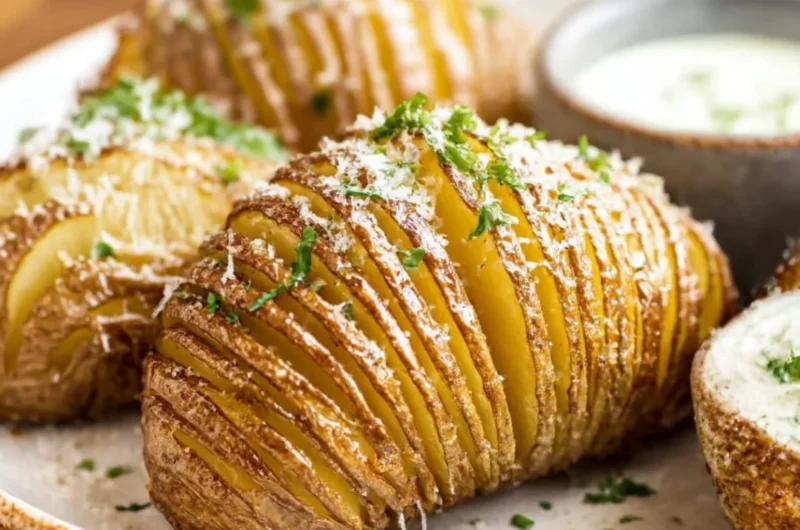
- Cheesy Delight: Sprinkle shredded cheese, like cheddar or Parmesan, between the potato slices halfway through baking for that extra ooey-gooey factor.
- Garlic Herb Bliss: Mix minced garlic and fresh herbs such as rosemary and thyme into the melted butter before brushing it over the potatoes for a fragrant twist.
- Zesty Citrus: Drizzle with lemon juice and zest for a bright, zesty touch—perfect for spring and summer gatherings.
- Indulgent Toppings: Finish with a dollop of sour cream or Greek yogurt and a sprinkle of chives for a creamy, rich addition.
Chef Emma’s Helpful Tips
- Slicing Trick: To avoid cutting all the way through, place two wooden chopsticks on either side of the potato while slicing; this will prevent your knife from going too deep!
- Make-Ahead Advice: You can prepare the potatoes a few hours in advance. Just brush them with the butter and place them in the fridge until you’re ready to bake.
- Storage Suggestions: Store any leftovers in an airtight container in the refrigerator. They reheat beautifully in the oven to regain some of that crispy goodness.
Nutrition Information per Serving
- Serving Size: 1 potato
- Calories: 200
- Carbohydrates: 40g
- Sugar: 1g
- Fat: 8g
- Protein: 3g
- Sodium: 600mg
Frequently Asked Questions
Can I make this ahead?
Yes! You can prep these potatoes a few hours in advance; just brush them with butter and place them in the fridge until baking.
Can I use different ingredients?
Absolutely! Feel free to customize them with your favorite spices, herbs, or cheese.
How do I store leftovers?
Store the leftover Hasselback potatoes in an airtight container in the refrigerator.
How long does it last?
Leftovers are best enjoyed within three to four days in the fridge.
Final Thoughts
This Hasselback potatoes recipe holds a special place in my heart, reminding me of family dinners filled with love and laughter. There’s something truly magical about taking a simple russet potato and transforming it into a stunning and delicious dish. Save this Hasselback Potatoes recipe to your cozy side dishes board so it’s ready whenever you need a comforting treat! Enjoy your culinary adventure and happy cooking!
Print
Hasselback Potatoes
- Total Time: 75 minutes
- Yield: 4 servings 1x
- Diet: Vegetarian
Description
Crispy and creamy Hasselback potatoes, perfect for any occasion and easily customizable to suit your taste.
Ingredients
- 4 medium russet potatoes
- 4 tablespoons melted butter
- Salt, to taste
- Pepper, to taste
Instructions
- Preheat the oven to 425°F (220°C).
- Wash and dry the russet potatoes thoroughly.
- Thinly slice the potatoes, making nearly all the way through, to create hasselback cuts.
- Place the prepared potatoes on a baking sheet, leaving space between them.
- Brush the melted butter generously over the potatoes, ensuring it gets in between the slices.
- Season the potatoes with salt and pepper.
- Bake in the preheated oven for about 45-60 minutes, or until crispy and golden brown.
Notes
For extra flavor, consider adding toppings such as cheese, garlic herbs, or a drizzle of lemon.
- Prep Time: 15 minutes
- Cook Time: 60 minutes
- Category: Side Dish
- Method: Baking
- Cuisine: American
Nutrition
- Serving Size: 1 potato
- Calories: 200
- Sugar: 1g
- Sodium: 600mg
- Fat: 8g
- Saturated Fat: 4g
- Unsaturated Fat: 4g
- Trans Fat: 0g
- Carbohydrates: 40g
- Fiber: 3g
- Protein: 3g
- Cholesterol: 30mg