Magic Custard Cake: A Slice of Creamy Comfort
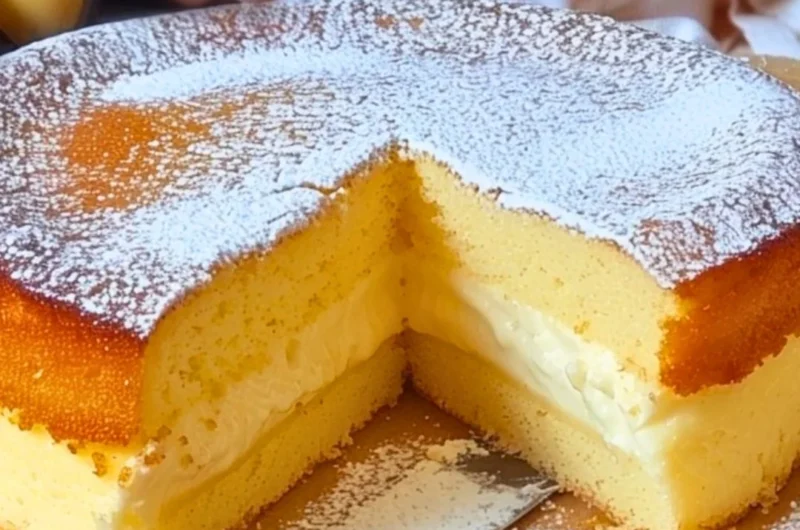
There’s something undeniably magical about desserts that can wrap you in a warm hug — and my Magic Custard Cake does just that. This delightful creation is a nostalgic treat that takes me back to my childhood, where sweet aromas danced through the air, and family gatherings felt complete with a luscious dessert on the table. As the soft golden top forms in the oven, a promise of creamy, custardy goodness emerges, filling your home with cozy anticipation.
Perfect for those chilly evenings when all you need is a little comfort, this easy fall dessert is sure to become a beloved classic in your recipe repertoire. This is one you’ll definitely want to pin for later!
Why You’ll Love This Recipe
- Creamy Goodness: With its unique three-layer structure, each bite surprises you with creamy, custardy filling that just melts in your mouth.
- Family-Friendly: Easy to whip up and perfect for sharing, this cake brings everyone together for a sweet celebration.
- Quick Prep: In just a short time, you can have this cozy dessert baking away, filling your kitchen with heavenly aromas.
- Crowd-Pleasing: Whether it’s a casual family dinner or a festive gathering, this cake will impress your guests and leave them asking for seconds.
- Versatile: You can enjoy it plain or get creative with toppings and flavors, making each experience delightful and unique.
What You’ll Need
To bring this magical treat to life, gather these simple ingredients:
- 4 eggs (separated, room temperature)
- ¾ cup caster sugar
- 125 g melted butter
- 1 tsp vanilla extract
- ¾ cup plain flour (sifted)
- 2 cups lukewarm milk
- ¼ cup icing sugar (for dusting)
Let’s Make It Together
- Preheat your oven to 340°F (170°C) and line an 8-inch square pan with parchment paper.
- In a mixing bowl, whip the egg whites until they form stiff peaks. Set them aside for now.
- In another bowl, beat the egg yolks and caster sugar together until the mixture turns pale and fluffy — this is where your anticipation begins!
- Gently mix in the melted butter and vanilla extract, ensuring a rich flavor permeates the batter.
- Gradually add in the sifted flour, stirring until it’s well combined and smooth.
- Slowly pour in the lukewarm milk, mixing it in until the batter is silky and free of lumps.
- Carefully fold in the whipped egg whites, ensuring you don’t deflate them. The batter will be thin and slightly lumpy, and that’s just right!
- Pour the batter into your prepared pan and bake for 35–60 minutes, or until a golden top forms and the edges pull away from the pan slightly.
- Allow the cake to cool completely in the pan before dusting with icing sugar, slicing, and enjoying this creamy delight.
Variations & Creative Twists
Feeling adventurous? Here are a few delicious variations to try:
- Citrusy Zest: Add the zest of one lemon or orange to the batter for a refreshing citrus twist that brightens every bite.
- Chocolate Lovers: Fold in a few tablespoons of cocoa powder for a rich, chocolatey version, and top with whipped cream and chocolate shavings.
- Nutty Delight: Incorporate some finely chopped nuts like almonds or hazelnuts for an indulgent crunch that complements the creamy custard.
- Fruit Toppings: Serve with fresh berries or a tangy fruit compote to create a lovely contrast of flavors and textures.
Chef Emma’s Helpful Tips
- Make-Ahead Magic: This cake can be baked a day in advance. Simply cover it and store it in the fridge, and it will be just as delicious the next day!
- Egg Separation: For the best results, ensure your egg whites are free of any yolk; otherwise, they won’t whip properly.
- Slicing Secrets: Use a warm, dry knife for slicing to prevent the custard from sticking, allowing for beautiful, clean slices.
- Storage Suggestions: Store any leftovers in an airtight container in the fridge for up to 3 days.
Nutrition Information per Serving
- Serving Size: 1 slice
- Calories: Approximately 190
- Carbs: 24g
- Sugar: 10g
- Fat: 8g
- Protein: 4g
- Sodium: 200mg
Frequently Asked Questions
- Can I make this ahead? Absolutely! This custard cake keeps well in the fridge for a day or two.
- Can I use different ingredients? Yes! You can substitute with different flours or dairy alternatives; just keep an eye on the consistency.
- How do I store leftovers? Store any uneaten slices in an airtight container in the refrigerator.
- How long does it last? The cake is best enjoyed within 3 days for optimal texture and flavor.
Wrapping It Up
Magic Custard Cake is more than just a dessert; it’s an experience, a family tradition, and a little piece of joy wrapped in every slice. Its simple ingredients transform into something truly special, making it a favorite for all occasions. I hope you find as much comfort in preparing and sharing this cake as I do. Save this Magic Custard Cake to your cozy treats board so it’s ready when you need a slice of happiness!
Print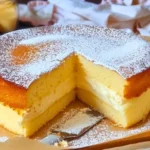
Magic Custard Cake
- Total Time: 75 minutes
- Yield: 8 servings 1x
- Diet: Vegetarian
Description
A delightful, creamy dessert with a unique three-layer structure, perfect for cozy evenings and family gatherings.
Ingredients
- 4 eggs, separated
- ¾ cup caster sugar
- 125 g melted butter
- 1 tsp vanilla extract
- ¾ cup plain flour, sifted
- 2 cups lukewarm milk
- ¼ cup icing sugar, for dusting
Instructions
- Preheat your oven to 340°F (170°C) and line an 8-inch square pan with parchment paper.
- Whip the egg whites in a mixing bowl until stiff peaks form. Set aside.
- Beat the egg yolks and caster sugar together until pale and fluffy.
- Mix in the melted butter and vanilla extract until well combined.
- Gradually add in the sifted flour, stirring until smooth.
- Pour in the lukewarm milk, mixing until free of lumps.
- Fold in the whipped egg whites carefully until just combined.
- Pour the batter into the prepared pan and bake for 35–60 minutes until a golden top forms.
- Cool the cake completely in the pan before dusting with icing sugar and slicing.
Notes
For variations, consider adding citrus zest, cocoa powder, chopped nuts, or serving with fresh fruit toppings.
- Prep Time: 15 minutes
- Cook Time: 60 minutes
- Category: Dessert
- Method: Baking
- Cuisine: International
Nutrition
- Serving Size: 1 slice
- Calories: 190
- Sugar: 10g
- Sodium: 200mg
- Fat: 8g
- Saturated Fat: 4g
- Unsaturated Fat: 3g
- Trans Fat: 0g
- Carbohydrates: 24g
- Fiber: 0g
- Protein: 4g
- Cholesterol: 70mg